Hi! Let's make some candles!
We made a fun
YouTube video you should check out too, but this blog will go into more detail. Have fun!
Supplies you'll need
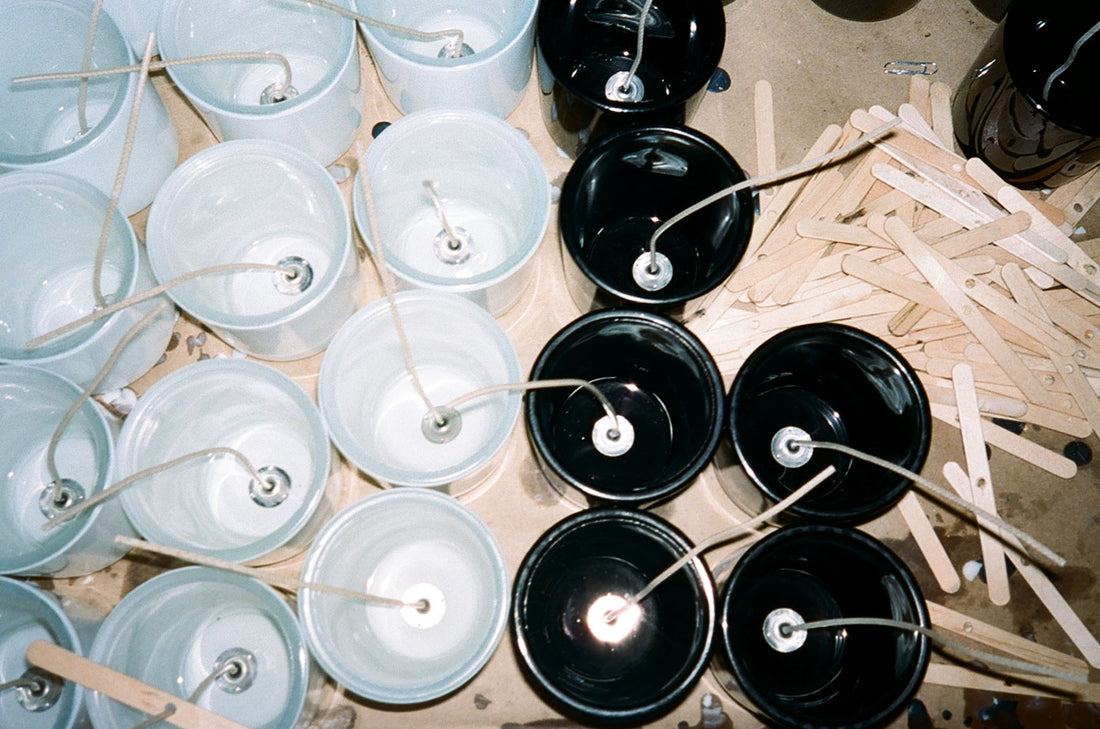
Vessel:
- Mason jars are safe to experiment with because they can sustain high temperatures.
- Jars with lids
- Mugs
- Teacups
- Tips: Make sure the top is open & has room to breathe. Reusing an old jar or glass with excess wax? Put it in the over for 5-7 minutes (depending on how much wax is left) and wipe it out with a paper towel. If there isn't much left, use a heat gun to melt it.
Wax:
- Soy wax (what we use) is natural, burns clean, and for twice as long as paraffin candles.
- Paraffin wax is a petroleum byproduct created when crude oil is refined into gasoline. Asphalt is extracted before paraffin in the refining process. It's that combustion which causes the black plumes of smoke & ash to collect throughout your house. (Paraffin is public enemy #1 here at Flores)
- Beeswax is perfect for when you need to make pillar candles and want to stick to an all natural blend! The only issues with beeswax are: it's costly (because bees make it) and it has a natural (nice) scent that can interfere with any fragrance you're trying to achieve.
- Coconut wax is similar to coconut oil in makeup. It tends to be soft at room temperature if it's not blended with soy or paraffin to offset the melting point.
Wicks:
-We use wicks made of all natural cotton fiber & beeswax coating with an aluminum metal base
Oils:
-Check for the oil's flash point (usually located on the bottle) to see at what temperature the fragrance should be added to the mixture, prior to pouring.
Pitcher: We highly recommend using a pitcher for safety & ease.
Optional:
Fragrance
Picking a fragrance oil or blend for your candle can be difficult if you have no idea what types of scents you like. I like to guide people into categories, which usually help them select a series of scents and blends that they enjoy: Fruity, Floral, Woodsy or Fresh.
If you have a favorite essential oil you like, do NOT blend directly into candle wax!
The real difference between an essential oil and a fragrance oil is that essential oils typically contain ONLY plant oils, whereas fragrance oils have the essential oils blended with a carrier oil (like grapeseed or jojoba) to elongate the burn time of the scent.

Setting up
Make sure you have a flat, dry area that can be easily covered by kraft paper, plastic wrap, garbage bags, or newspaper. Tape down if needed.
1. Place wax into the metal pitcher. Heat to 160°F-180°F.
2. While the wax is melting, prepare the jars by affixing the wick's aluminum tab to the bottom of the jar. You can use a glue dot or hot glue gun. Pro tip: make sure you space the wicks out evenly if you're using multiples to ensure they can breathe. The more stable the flame, the more even the burn!
3. Stabilize the wick with the stick (metal or wood). Cut off the end of the wick, leaving 1 inch of wick above the stabilizer.
4. Once wax is melted to liquid, let cool for a few minutes.
5. Add fragrance. Use 1-1.5 oz. of fragrance oil per 1 lb of wax. If you're using essential oils, make sure to dilute it with a carrier oil like grapeseed.
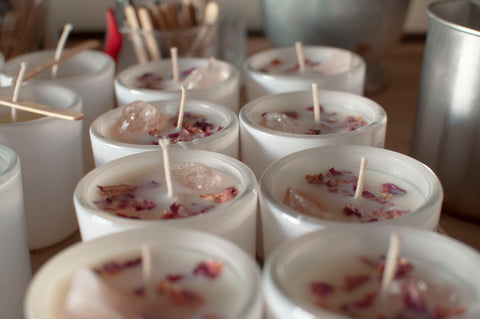
6. Pour the wax into the vessels. Let each cooling candle sit about 2 or more inches away from each other.
7. Now we wait!
After the candles have dried
Sometimes the candle will crack or even get pockets of air that get caught inside, causing them to collapse. If your candle looks like cottage cheese, you've either added too much fragrance or overheated it. You can create a finished look by heat gunning the top or using a hair dryer that has a heated feature. Sometimes I pour a little layer of new wax on top to seal it in if there's space in the jar!
Oops, you spilled. It happens!
Clothes: let it dry, pick off what you can, and then take an iron covered by a paper bag to the area and soak it up.
Floors, marble, pretty much everywhere else: heat gun or hair dryer - just don't hold it on any surface for too long!
You did it!
Maybe it was messy or didn't turn out exactly how you wanted. That's ok! Allow yourself to experiment and try new things. We hope you had fun :)